When presenting Chef to prospects and customers the always ask: “Great, Chef automates every cloud application we want, but where can Business order the services and see it´s billing status?
I mostly refer to 3rd party tools were we have integrations with, like VMware vRealize, ServiceNow etc. but this isn´t a portal-only approach. I did some research and looked into a product called Scalr. When installing it the first time in my demo environment I was really happy to see that Scalr uses Chef internally to configure their server. Whilst this is just a positive side effect I noticed that Scalr is best for hybrid cloud scenarios. It supports end-points like VMware vSphere, HP Helion, OpenStack, AWS and azure what should fit in most enterprise environments. Please note that the Service Catalog in not available in the Community Edition: https://scalr-wiki.atlassian.net/wiki/display/docs/Service+Catalog
The configuration needs a few steps:
- Login as “admin”, credentials are stored here: /etc/scalr-server/scalr-server-secrets.json
- Create a new user and login as the new user
- Add Cloud credentials (New user checklist menu on the landing page)
When configuring Scalr you can easily add a Chef Server (I used the public hosted one) clicking the Scalr symbol on the top left:

You can also add a general Chef-Server in the admin console. Now the Chef-Server is available with all it´s cookbooks, roles, environments etc. Next step is to create an image that can be used in Roles and Farms. The easiest ways to create a new Image is to click on “Images” and then “New Image”. The popup box will ask for a type of creation and you can go with “Image Builder”. Now you can build your image with additional software if needed. In our case we just use the plain Ubuntu with the Chef client option. Please note that you can create a Role in parallel using the checkbox below the name.
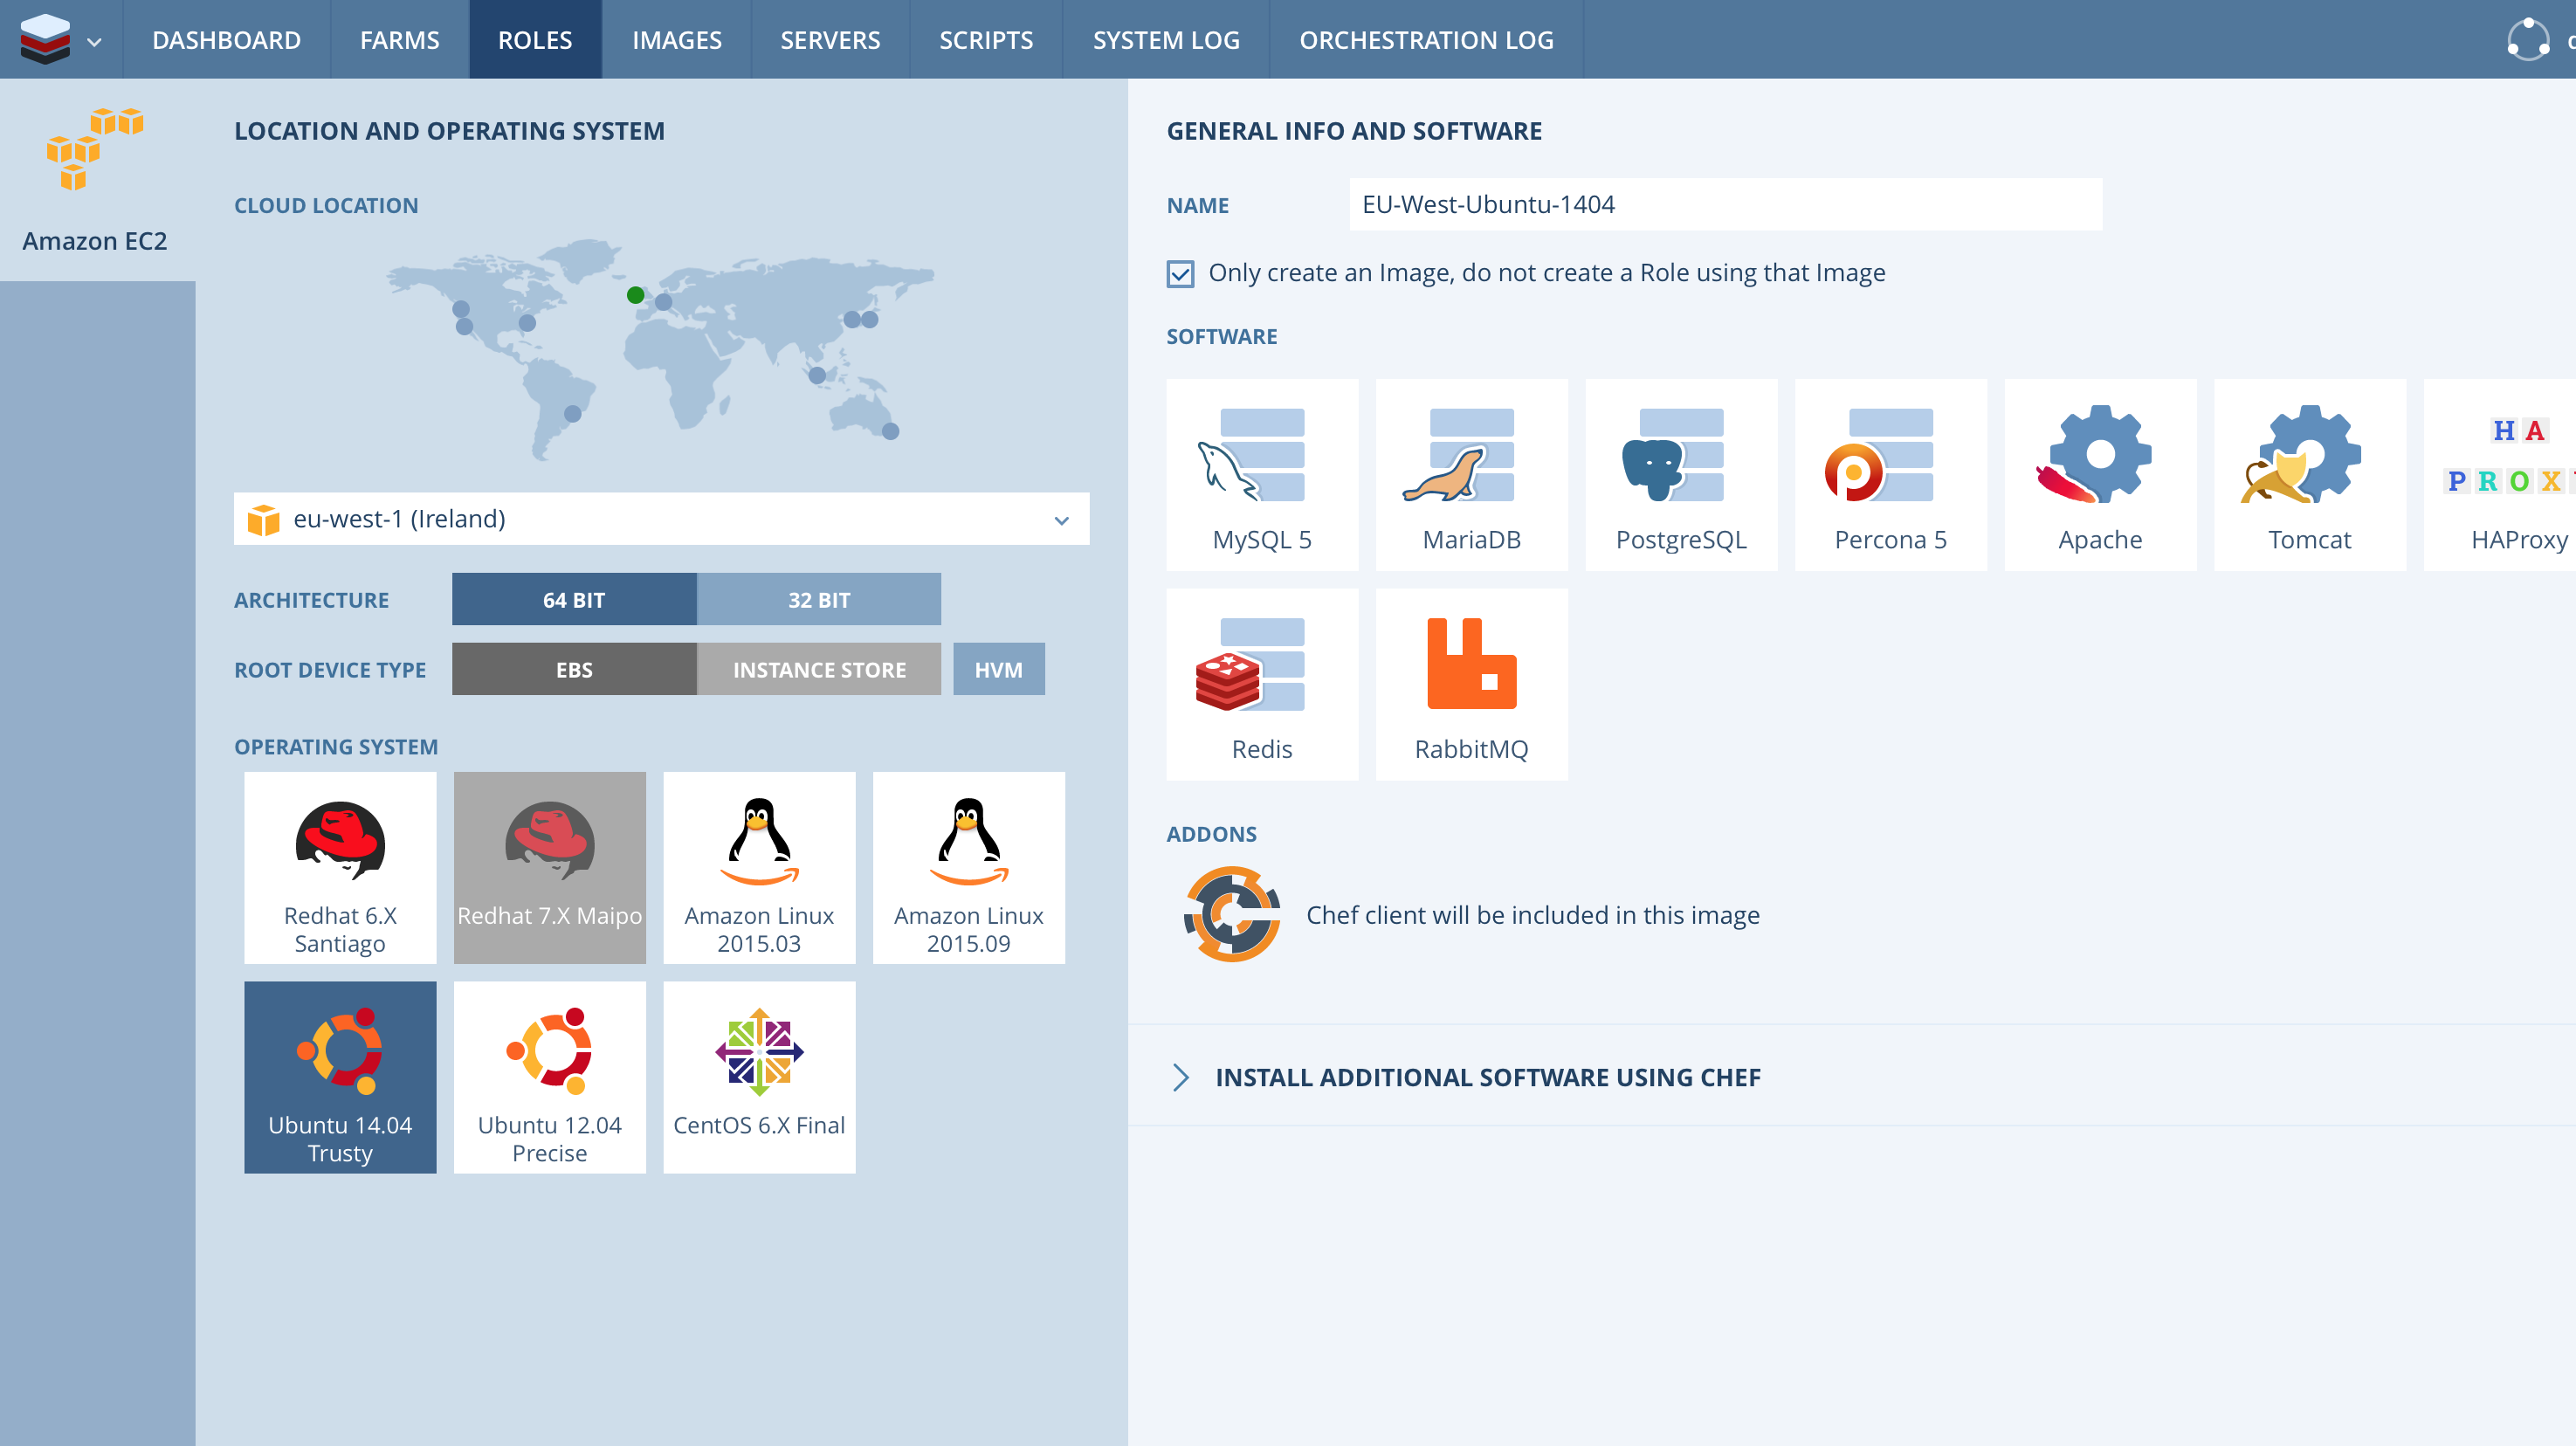
After the image creation is finished you will see your image in the list. You also have the chance to see the log file while the images (AMI) is created. If you haven´t unchecked the “Only create an image…” box you have to create a role now. Because there is already an image please use “New role” instead of Role Builder.
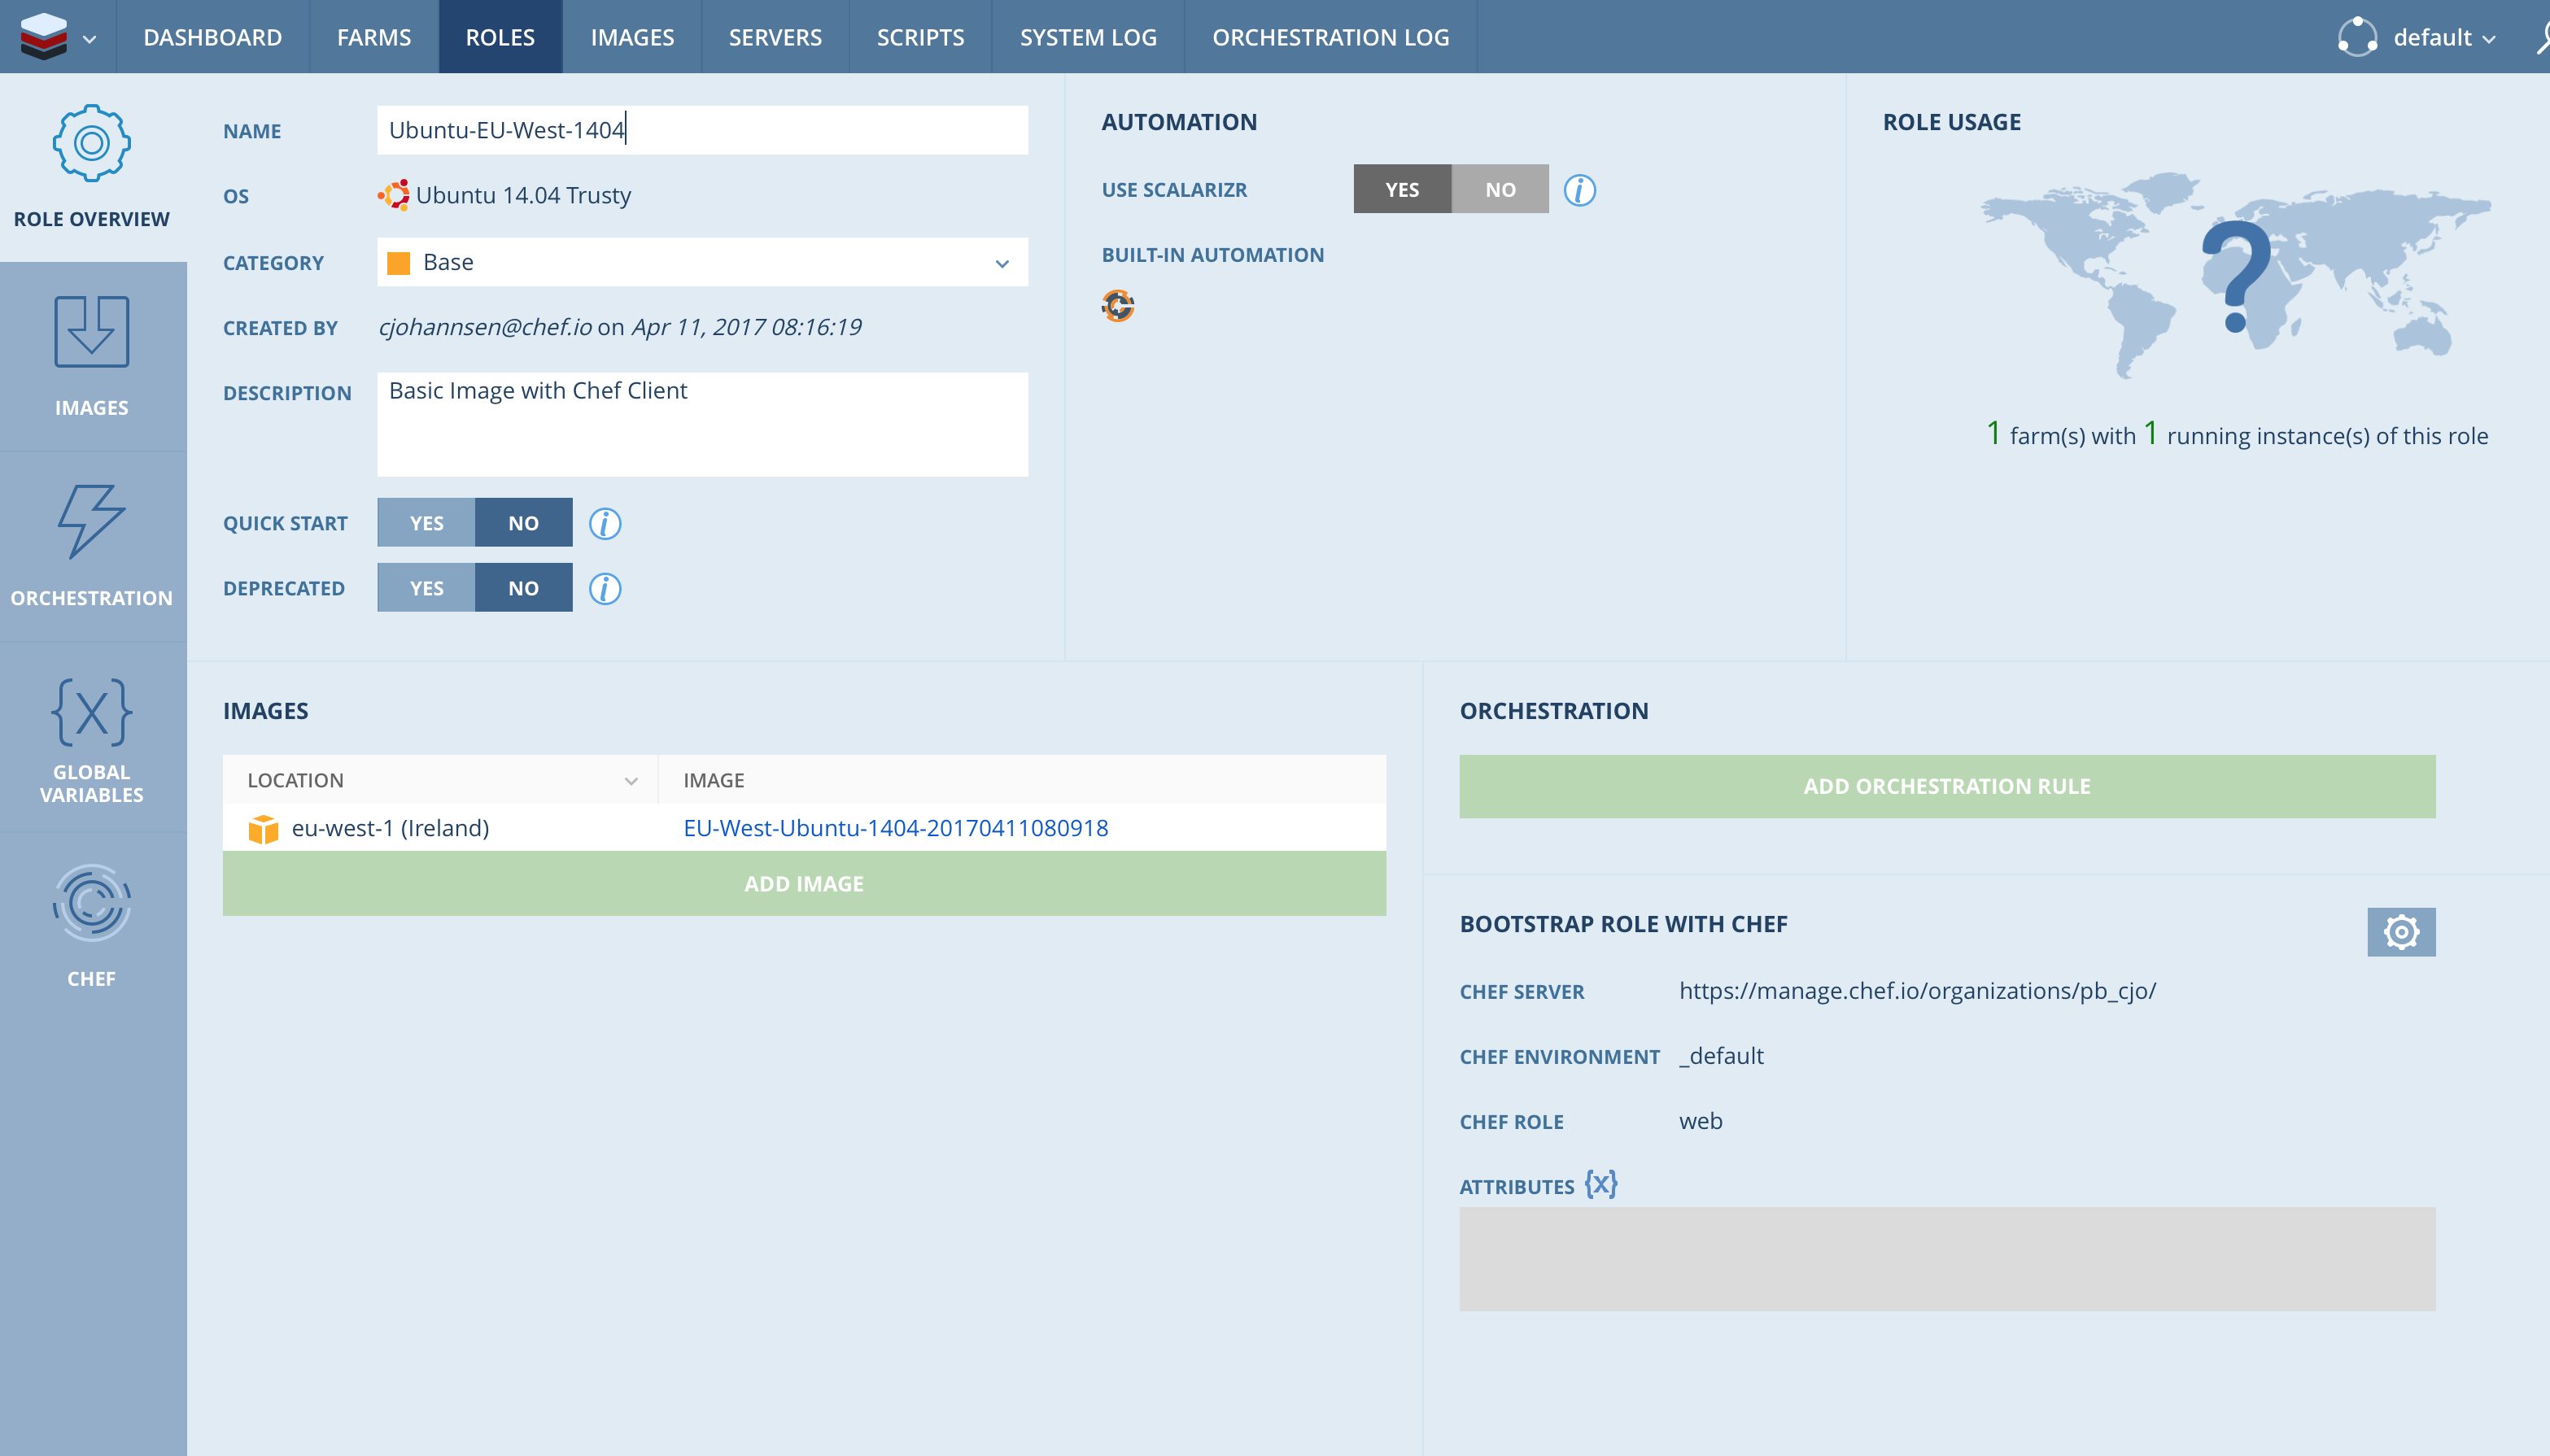
Beside adding an already created image you have the option to add auto-scaling and different other options. Clicking the “CHEF” tab allows you to choose the right Role/Cookbook for this kind of servers.
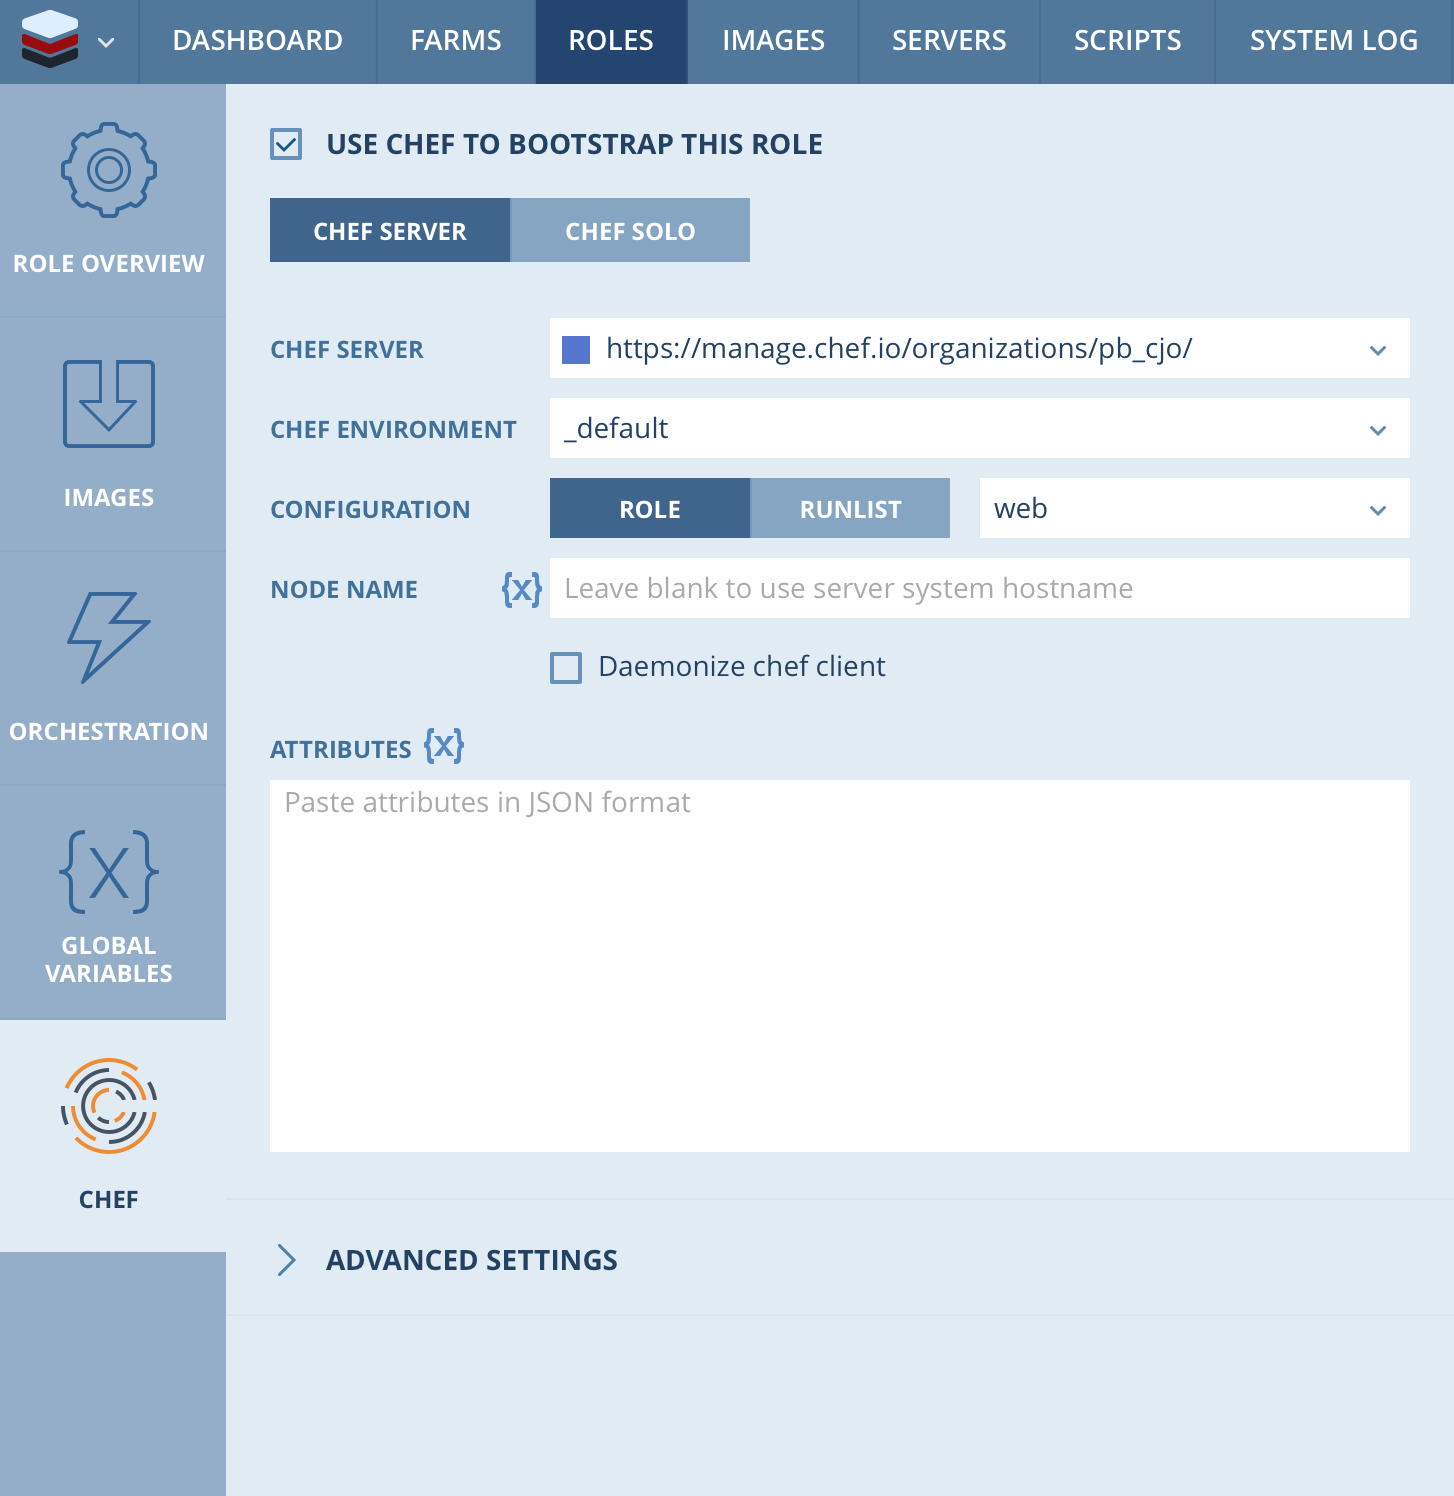
PRO-TIP: Please remember to press “Save” as I was surprised how many “Save” buttons are there 🙂
In my demo case I use a role called “web” which just installs a Apache2 web-server on the target machine. Now you can finally create a Farm (“New Farm”) that uses the Role and it´s images and the Chef automation goodness. Please remember to add a Farm role to add your role/image to the newly created farm.
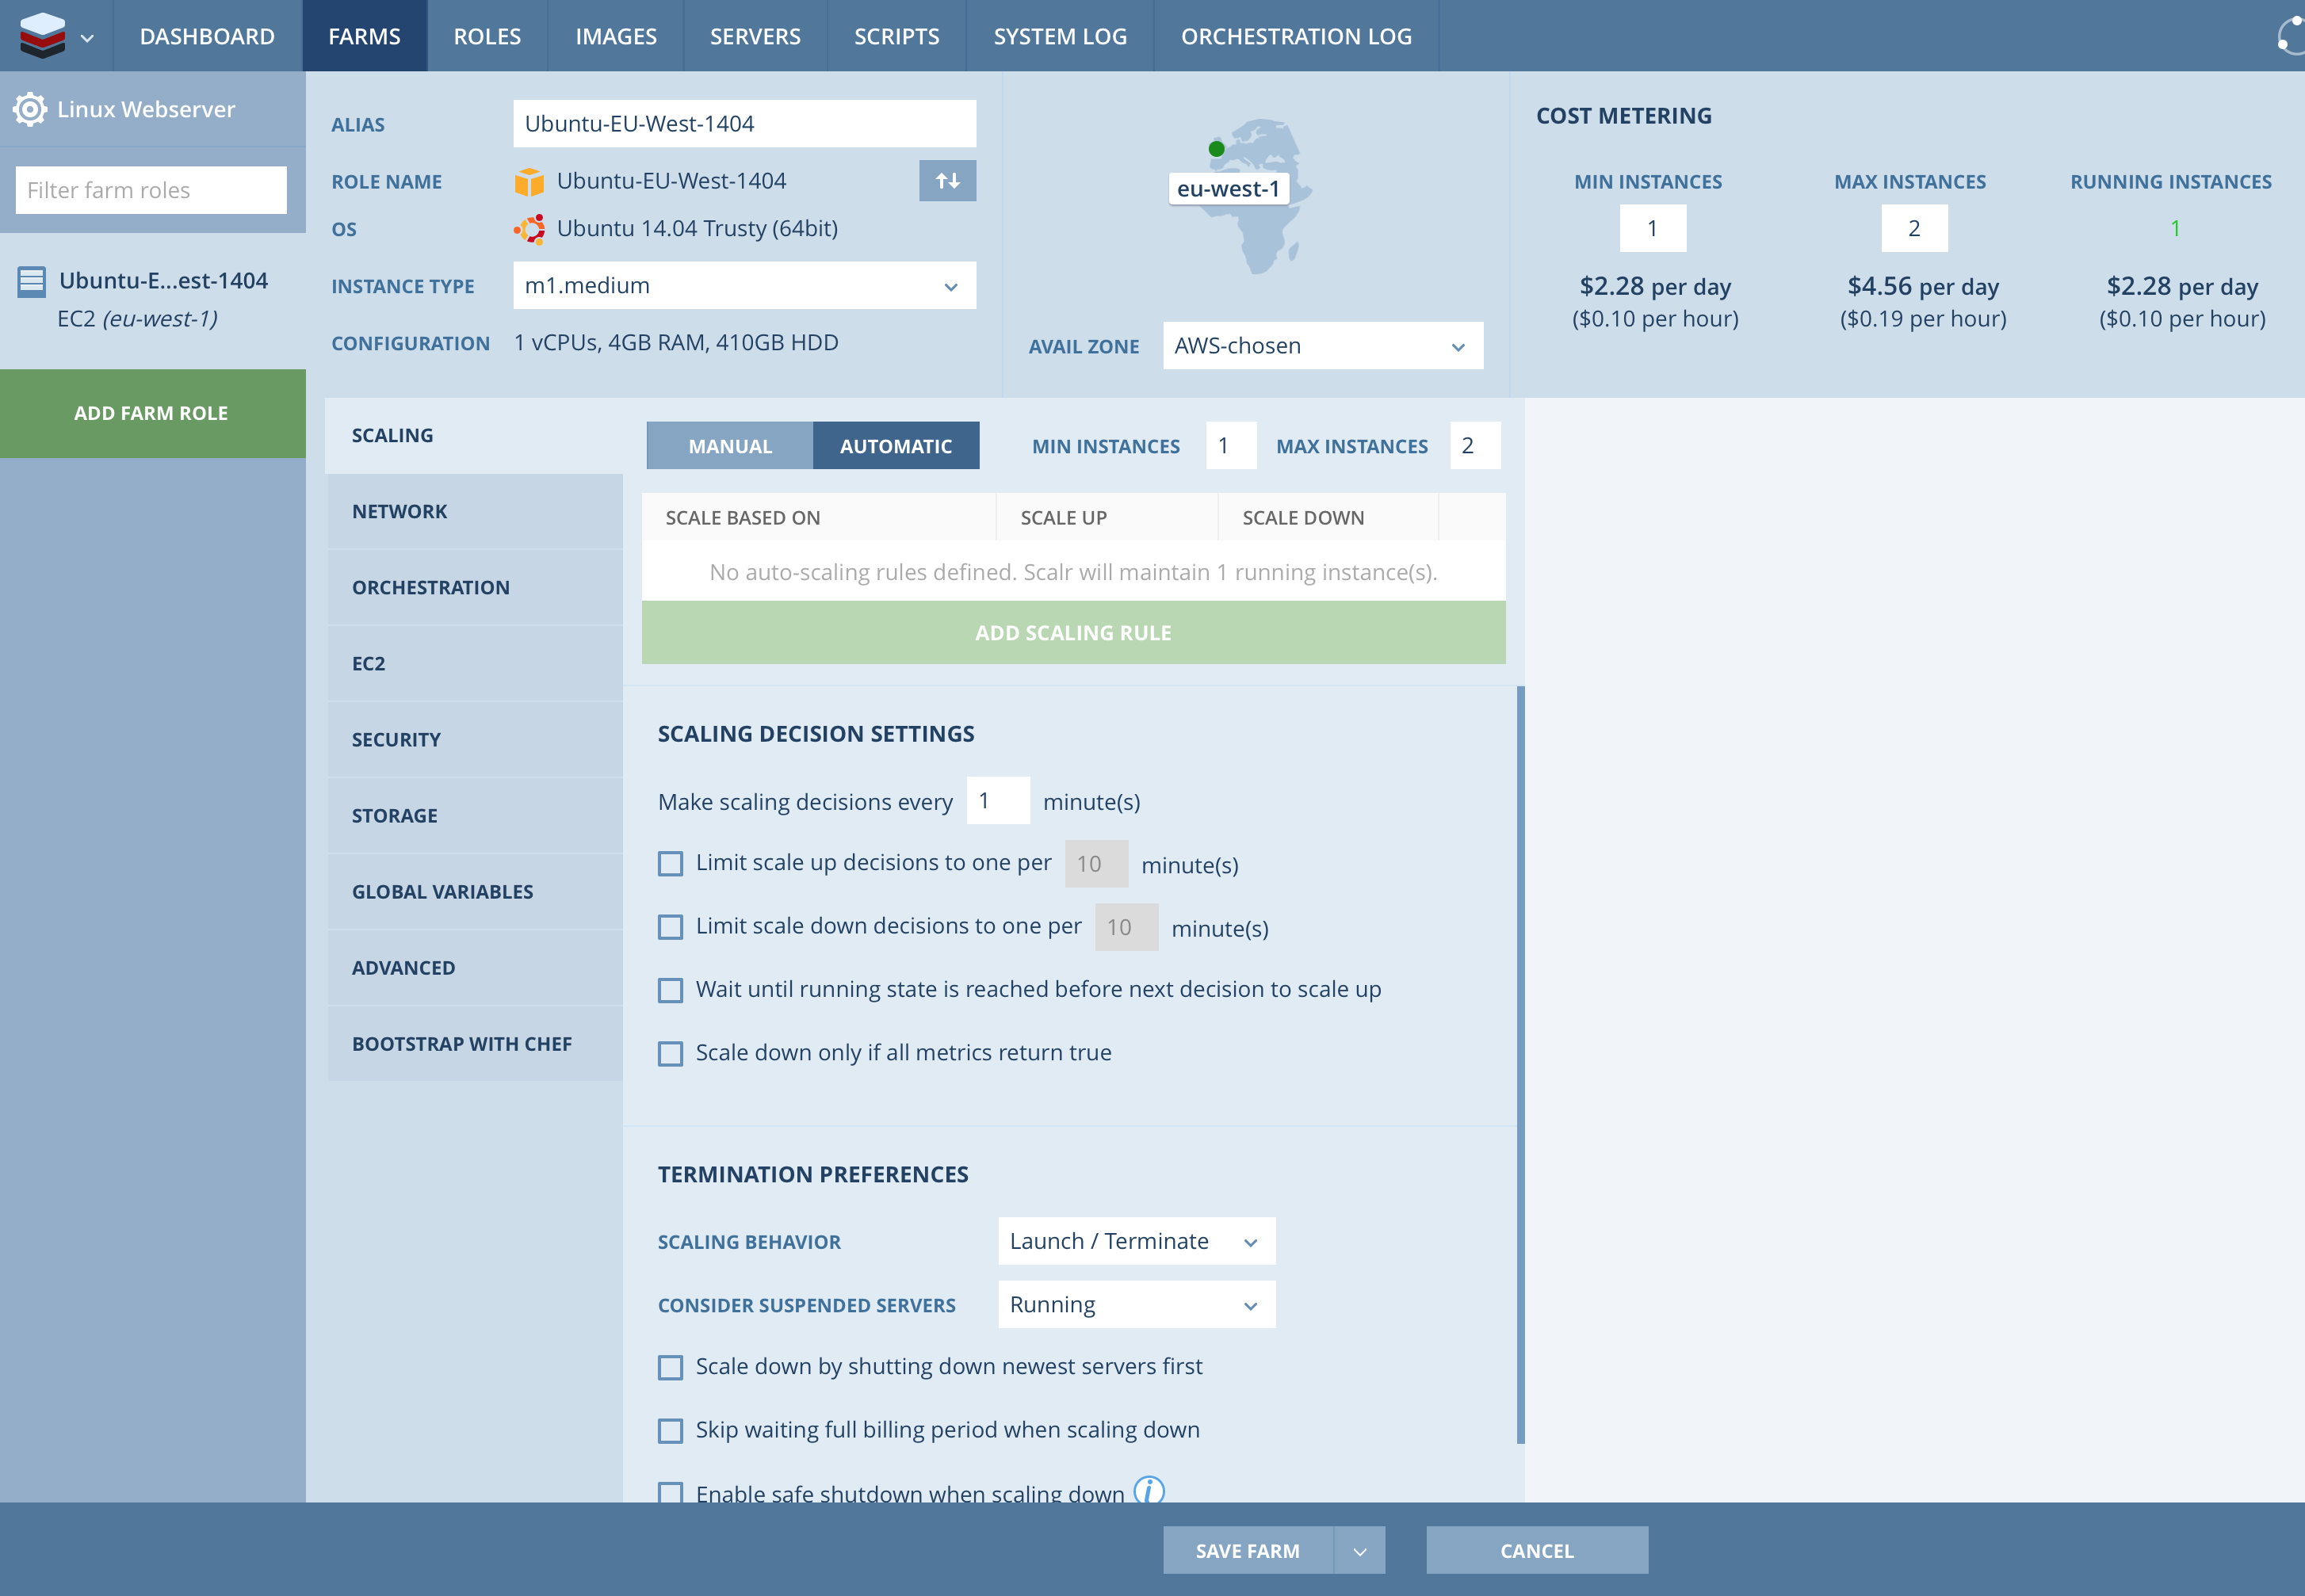
Finally your work is done and you can Start your farm using the Action buttons on the right.

With the logs available in Scalr you can also check if the Chef automation was successful.
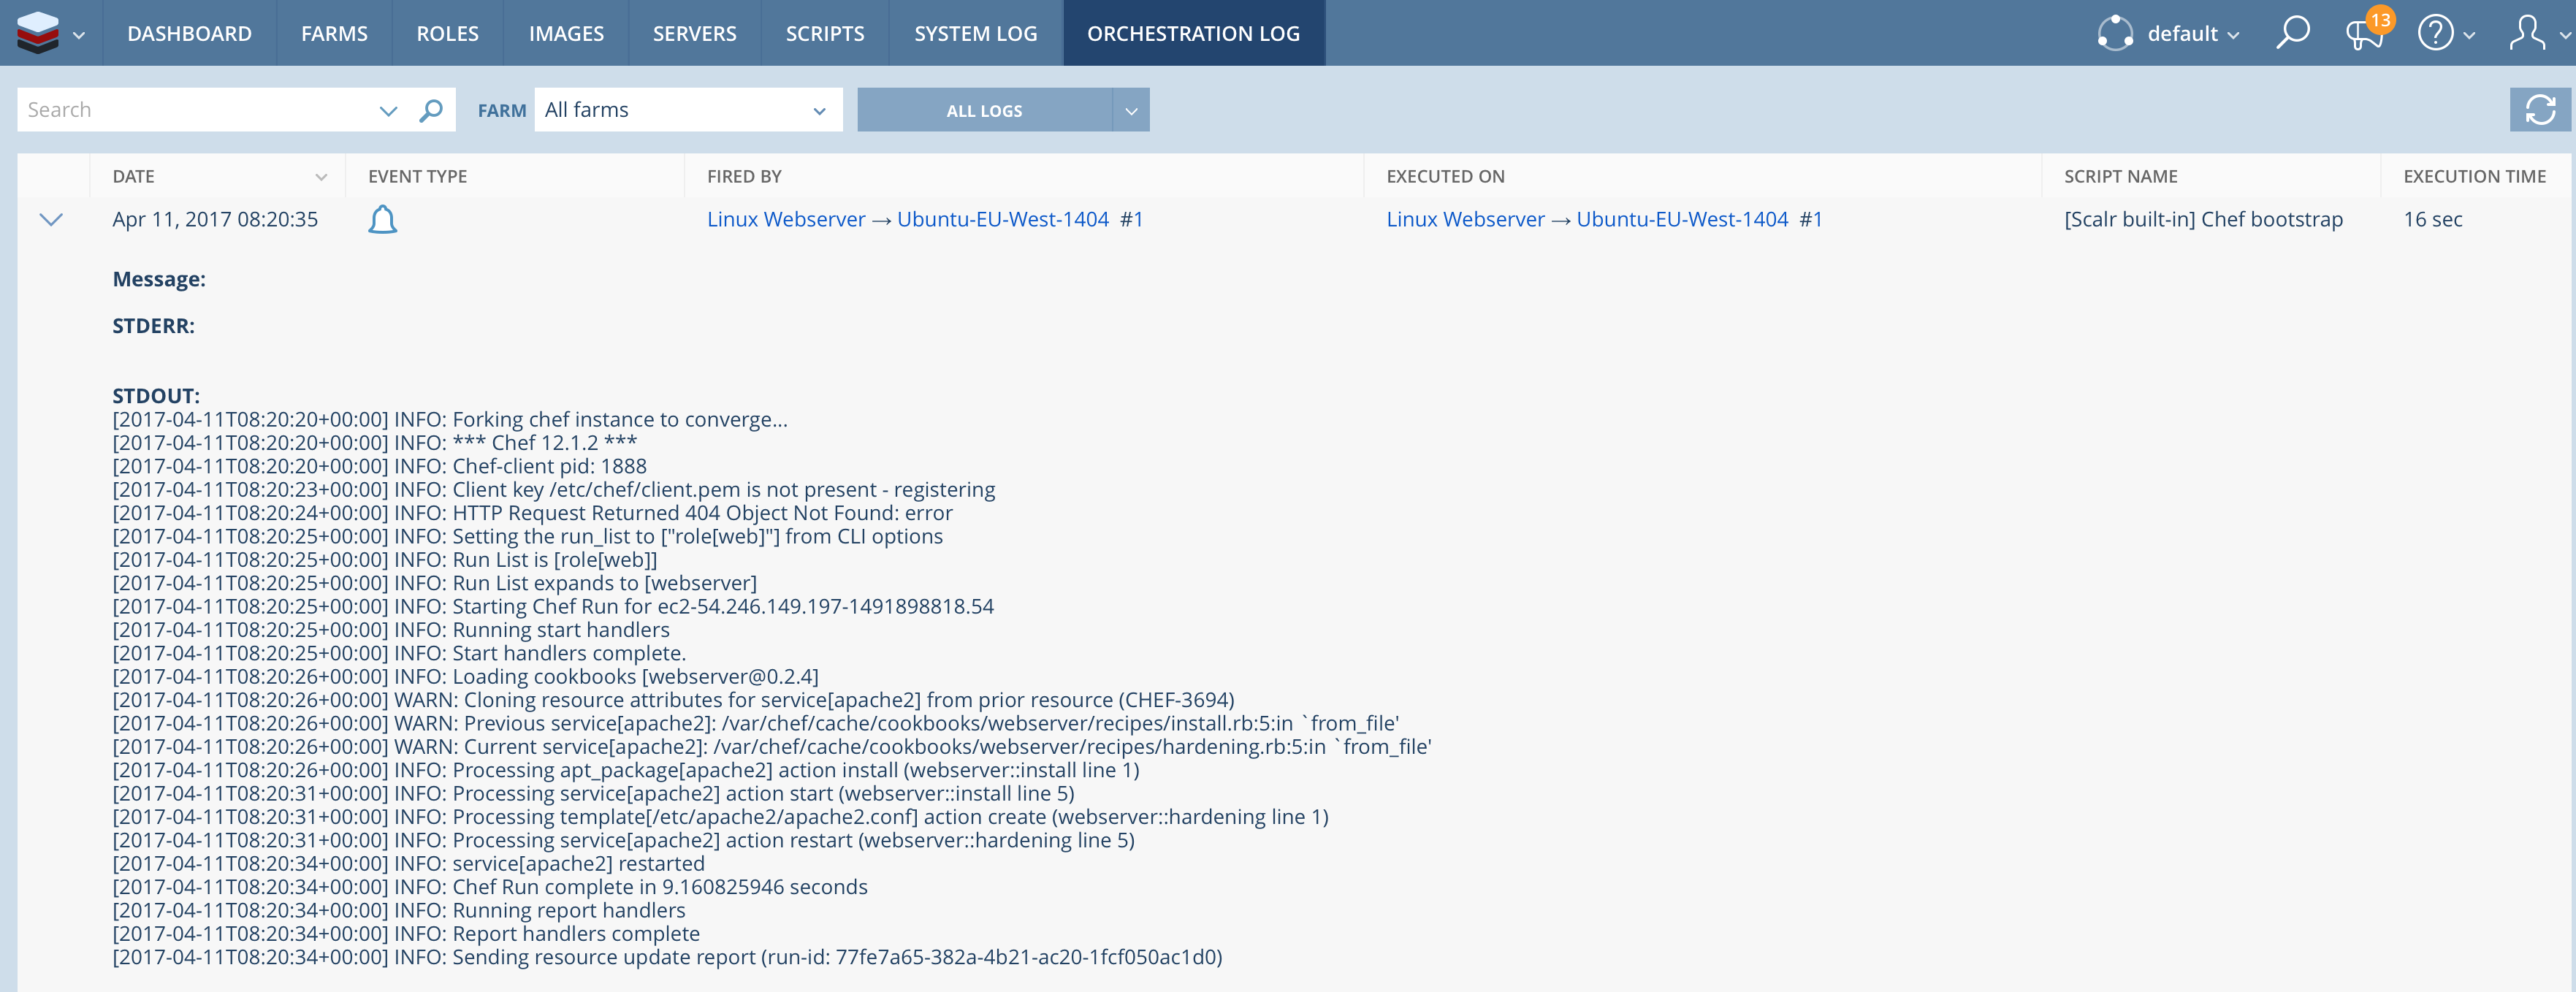
In my demo case the validation is easy as well as I can check for a new node in Chef Manage and check the standard website of the web-server.

The website… no magic, I know 🙂

In my opinion this frontend allows to keep the enterprise role model of Business user who just want to order and Application owner who builds and delivers the service in the background.